How to Design a Residential Equipment Condensate Drain Network With Accessible Cleaning and Inspection Points
Most homeowners never think about where the water from their air conditioner goes until it shows up on the ceiling. Every cooling system pulls moisture from indoor air, and that water has to leave the house through a drain line. In a home with one air handler the route is simple. In a home with two or three systems, a dehumidifier, and a high-efficiency furnace, the condensate lines multiply fast, and each one is a separate chance for a clog, a leak, or a slow overflow that nobody notices for months.
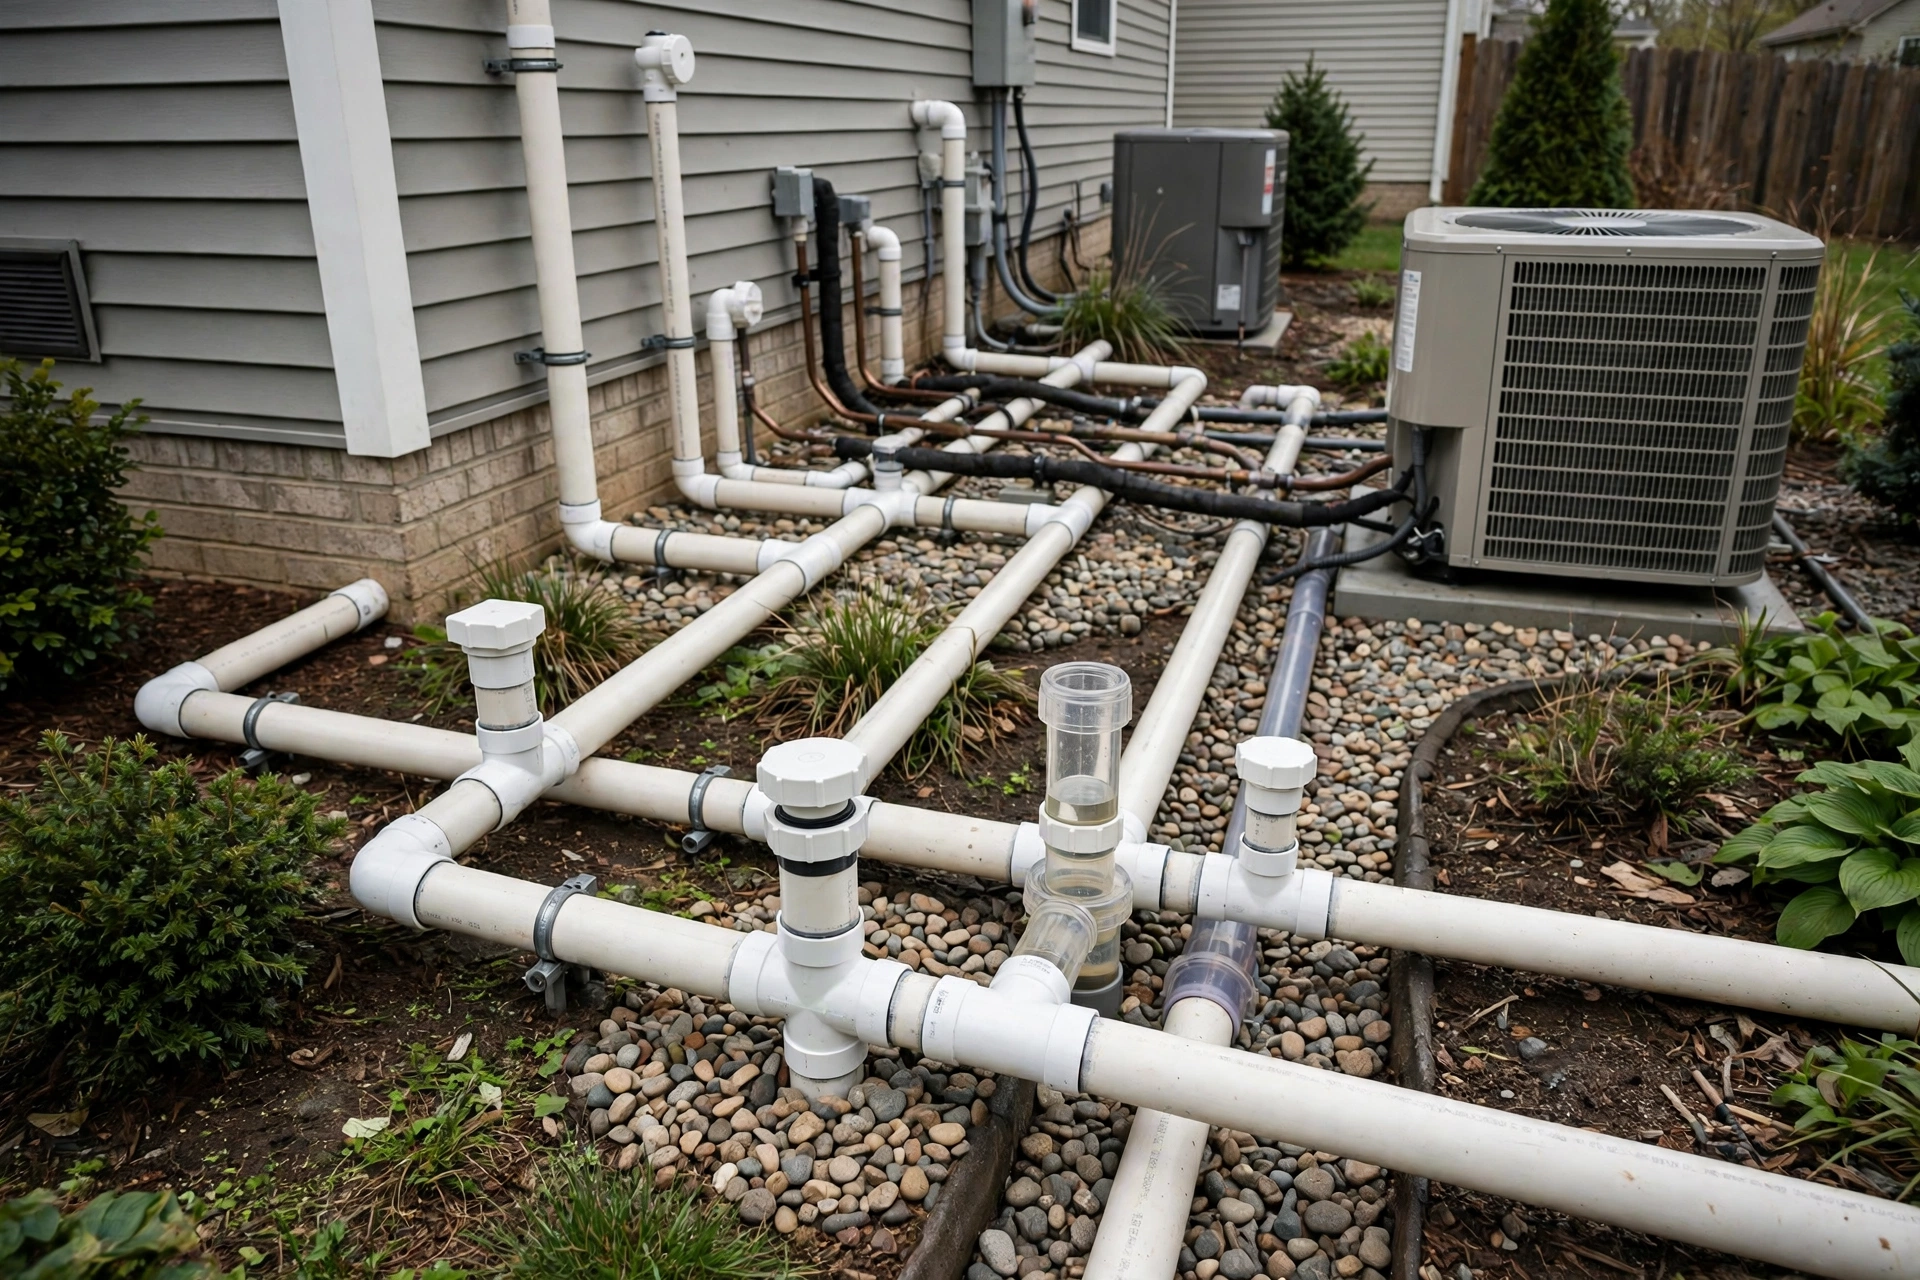
The short answer is that a residential equipment condensate drain network ties every condensate source into one planned system: short branch lines from each piece of equipment, proper traps and vents, cleanout tees at every accessible point, and a single reliable discharge route. Instead of five independent lines snaking through attics and closets, you get one mapped network that any technician can inspect in minutes and any homeowner can flush once a season.
Why Scattered Condensate Lines Fail Before the Equipment Does
A single condensate line is easy to get right. The trouble starts when a home gains a second air handler in the attic, a dehumidifier in the basement, and a condensing furnace in the garage, each installed by a different contractor in a different year. Each installer runs the shortest line to the nearest exit, and nobody maps the whole system. The result is a tangle of thin PVC lines with flat spots, low bellies, and joints hidden behind drywall, and the first sign of trouble is usually a stained ceiling or a musty smell in a closet.
Scattered lines also fail because they share nothing. When one line clogs, there is no alternate path, no visible warning, and no easy way to find the blockage. A network changes that logic. Branch lines join a common main with cleanouts at the junctions, so a clog in one branch cannot flood the house, and a technician can isolate the problem without opening walls.
What a Residential Equipment Condensate Drain Network Actually Includes
A condensate drain network has four parts that work together. The branch lines carry water from each evaporator coil, dehumidifier, or condensing appliance to the main. The traps block air from entering the drain while letting water flow out. The vents break suction so the water keeps moving. And the discharge point sends the water somewhere safe, either into the plumbing system through an approved connection or outside to a spot where it cannot damage the house.
- Branch lines in 3/4-inch PVC from each condensate source to the shared main
- A P-trap at every air handler, sized to the blower’s static pressure
- A vent riser after each trap, taller than the drain pan’s flood rim
- Cleanout tees with threaded caps at every junction and change of direction
- A float switch in the auxiliary pan that stops the equipment before an overflow
None of these parts is expensive on its own. The value is in how they connect. A trap without a vent siphons dry and lets air into the line. A cleanout buried behind drywall is no cleanout at all. When every part is present and reachable, the network behaves like a single well-designed drain instead of a collection of hopeful pipes.
Mapping Every Condensate Source Before You Run a Single Pipe
Start by walking the house and listing every device that produces condensate. The obvious ones are the air handlers and evaporator coils. The easy ones to miss are the whole-house dehumidifier, the high-efficiency furnace, and the heat-pump water heater. Each one needs a branch line, and each branch line needs a route with continuous fall toward the main.
- Note the location, elevation, and condensate output of every air handler and coil
- Add dehumidifiers, condensing furnaces, and any other appliance that drains water
- Mark the route of every branch line on a simple floor plan before cutting pipe
- Identify the lowest practical point where the shared main can discharge safely
A hand-drawn plan taped inside the air handler closet is worth more than a perfect memory. When a technician arrives three years later, the plan shows where every line runs, where the cleanouts sit, and where the main discharges. That single sheet can turn a two-hour hunt into a ten-minute flush.
Sizing Branch Lines and the Shared Main for Real-World Flow
Most residential condensate branches use 3/4-inch PVC, and that size works well for a single air handler. The mistake is keeping the same size for a shared main that carries three or four branches. A main that is too small backs up when two systems drain at once during a humid afternoon, and the water finds the lowest overflow point, which is usually a drain pan above a finished ceiling.
| Condensate source | Suggested pipe size | What to remember |
|---|---|---|
| Single air handler branch | 3/4-inch PVC | Keep the run short with steady fall |
| Two systems sharing a main | 1-inch main | Upsize at the first junction |
| Three or more systems | 1-1/4-inch main | Check combined peak flow in humid weather |
| Dehumidifier branch | 3/4-inch PVC | Route it to the nearest main junction |
| Condensing furnace branch | 3/4-inch PVC | Follow the furnace manual for trap depth |
Slope matters as much as size. A quarter inch of fall per foot keeps water moving and carries fine debris with it. An eighth inch per foot can work on a short, straight run, but it leaves almost no margin for a sagging hanger or a slightly bowed joist. Support the pipe every three to four feet so the slope you build on day one is still there in year five.
Trap Placement That Keeps Air Out and Water Moving
The trap is the most misunderstood part of a condensate drain. On a negative-pressure air handler the blower pulls air in through any open drain, so the trap must hold enough water to seal against that suction. A trap that is too shallow dries out or gets pulled empty, and the drain stops flowing even though the pipe is clear. On a positive-pressure unit the trap keeps conditioned air from blowing out through the drain and misting the closet.
Size the trap to the equipment. A common rule from manufacturers is roughly one inch of trap depth for each half inch of water column of static pressure, with the outlet lower than the inlet by at least the pipe diameter. Place the trap close to the coil outlet where it stays accessible, and never bury it inside a wall cavity. A trap you cannot see is a trap you cannot prime, and a dry trap is the same as no trap at all.
Cleanout Tees and Inspection Points at Every Turn That Matters
A cleanout is a capped tee that lets a technician push a brush, a vacuum hose, or a gallon of rinse water into the line. The best place for the first cleanout is at the coil outlet, before the trap, because that is where algae and dust collect first. Add another at every junction where a branch meets the main, and at any long horizontal run where a clog could hide between two distant points.
- A capped cleanout tee at each coil outlet, before the trap
- A cleanout at every branch-to-main junction for isolating a single line
- Inspection access at the main’s highest point and just before the discharge
- Threaded caps left unglued so they can be removed without cutting pipe
Label every cleanout with a small tag or a mark on the pipe. In an attic full of identical white PVC, labels are the difference between flushing the right line and guessing. The caps should be hand-tight and reachable without moving stored boxes or removing a blower panel.
Choosing a Discharge Route That Protects the House and the Yard
A condensate network can discharge into the plumbing system through an approved air-gap connection, such as a dedicated standpipe or a lavatory tailpiece adapter, or it can run outside. Indoor discharge keeps the water out of the weather, but it needs a trap, a vent, and an air gap so drain gases can never enter the condensate line. Outdoor discharge is simpler, but the outlet must sit where the water cannot pool against the foundation or freeze across a walkway.
| Discharge route | Best for | Watch out for |
|---|---|---|
| Plumbing standpipe with air gap | Homes with a nearby drain | Needs its own trap and vent |
| Lavatory tailpiece adapter | A single unit near a bathroom | Keep the air gap visible and open |
| Exterior outlet away from foundation | Warm climates and simple gravity runs | Keep it at least two feet from the wall |
| Condensate pump to a drain | Basement units below grade | Pump needs power, a check valve, and an alarm |
Whatever route you choose, keep the secondary or emergency drain separate and visible. Its job is to warn, not to drain quietly. A secondary line that drips over a window or a doorway tells the homeowner something is wrong long before the ceiling does.
Seasonal Flushing and Algae Control Without Harsh Chemicals
Condensate lines clog because warm, dark, slow-moving water grows algae and biofilm. A seasonal flush breaks that cycle before it becomes a blockage. Once in spring and once in autumn, open the cleanout nearest the coil, pour in a gallon of warm water, and watch it arrive at the discharge. If the flow is slow, follow with a wet-dry vacuum at the cleanout to pull out the loose growth.
Skip the harsh drain chemicals. Bleach and caustic cleaners can damage PVC cement, corrode metal pans, and harm the helpful bacteria in a septic system if the line ties into plumbing. Plain water, a soft brush, and a vacuum handle most residential lines. If algae keeps returning quickly, check the slope and the trap first, because a line that holds standing water will always grow faster than one that drains clean.
Warning Signs That a Hidden Section Is Starting to Clog
A condensate network usually warns you before it floods. The air handler may short-cycle or shut off because a float switch tripped. A musty smell near the closet can mean a pan is holding water it should have drained. Gurgling from a nearby sink when the air conditioner runs can mean the condensate line shares air with a plumbing vent it should not.
- The system shuts off unexpectedly and a float switch has tripped
- Water stains or damp spots appear on the ceiling below an attic unit
- A musty smell lingers near the air handler closet even after a filter change
- The secondary drain drips outside, which means the primary is already blocked
Treat any one of these as a prompt to flush the network the same week, not next season. A clog that is caught while the secondary drain is still dripping costs a gallon of water and ten minutes. The same clog a month later costs a ceiling, a paint job, and a weekend of drying equipment.
Condensate Drain Network Questions Homeowners Ask Most
How often should a condensate drain network be flushed?
Twice a year is enough for most homes, once in spring before the cooling season and once in autumn after it ends. Homes in very humid climates, or with several systems sharing one main, benefit from a third flush in midsummer. Each flush takes about ten minutes per cleanout and needs nothing more than warm water and a wet-dry vacuum.
Can all my air handlers share one condensate main?
Yes, provided the main is sized for the combined flow and every branch has its own trap and cleanout. Two systems usually need a one-inch main, and three or more need a one-and-a-quarter-inch main. Each branch should join the main with a wye fitting, not a tee, so water from one branch cannot push back into another.
Why does my condensate trap keep drying out?
A trap dries out when the system sits idle for weeks, when the trap is too shallow for the blower’s static pressure, or when a missing vent lets the trap siphon dry. Pour a cup of water into the cleanout before the cooling season starts, and check that the vent riser after the trap is open and taller than the drain pan.
Is it safe to pour bleach into a condensate drain?
It is best avoided. Bleach can weaken PVC cement joints, corrode metal drain pans, and damage septic systems when the line connects to plumbing. Warm water, a soft brush, and a vacuum remove algae safely. If growth returns fast, the real fix is better slope or a deeper trap, not a stronger chemical.
Where should the secondary drain discharge?
Somewhere visible, such as above a window or a doorway the homeowner passes daily. The secondary drain is an alarm, not a second drain, so hiding it defeats its purpose. Never route it over a walkway where dripping water creates a slip hazard, and never tie it into the primary line.
Final Thoughts: A Condensate Drain Network That Stays Out of Sight and Out of Trouble
A condensate drain network is not glamorous work, and nobody shows it off to guests. Its reward is quieter: ceilings that stay dry, closets that smell like nothing at all, and service visits that take minutes instead of hours. The ingredients are simple, which are mapped branches, honest slope, traps sized to the equipment, cleanouts at every junction, and a discharge point chosen on purpose. Build those in once, flush the lines twice a year, and the water your cooling system removes will leave the house the way it should: silently, completely, and without ever becoming your problem.